
Project Zomboid Server Settings and Workshop Mods
A Project Zomboid server is shaped by three files: one for the server itself, one for the world rules (zombies, loot, power and water), and one for spawn points. This guide explains which setting lives where, the quickest way to build a sandbox preset without guessing at numbers, how to add Steam Workshop mods and maps so they actually load, and how to manage admins and whitelists.
On this page (7 sections)
Examples use the default server name servertest. If your server uses a different name, the file names change to match.
The three config files
In the Game Hosting Panel, open Files and go to Zomboid/Server/:
servertest.ini: server name, password, player slots, PvP, whitelist and mods.servertest_SandboxVars.lua: world rules such as zombie population and speed, loot rarity, when water and power shut off, and XP.servertest_spawnregions.lua: which towns new characters can spawn in.
Saves are in Zomboid/Saves/Multiplayer/servertest/ and player accounts in Zomboid/db/servertest.db.
You do not have to edit them by hand: the panel's Game settings page covers the common options (joining, gameplay, world rules and saving), and Mods handles the Workshop lists. This guide explains the files behind them.
Warning: Always stop the server before editing these files. The server rewrites its settings files itself, so edits made while it runs can be overwritten.
servertest.ini settings worth changing
PublicNamee.g. Knox County Survivors- The name shown in the in-game server browser.
PublicDescription- A short description for the browser. Mention your mods and rules.
Publice.g. true- List the server in the public browser. Set to
falseto only join by address. Passworde.g. changeme- Server password. Leave empty for an open server.
MaxPlayerse.g. 16- Player slots. More players and more mods both need more memory.
PVPe.g. false- Whether players can hurt each other.
PauseEmptye.g. true- Freezes game time when nobody is online, so the world does not decay while everyone sleeps.
Opene.g. falsefalsemakes the server whitelist-only: only accounts that already exist on the server can join.GlobalChate.g. true- Allows chat across the whole map.
SleepAllowed / SleepNeedede.g. false- Whether players can sleep in multiplayer, and whether they have to.
ServerWelcomeMessage- Shown in chat when a player joins. Use
<LINE>for a new line. SaveWorldEveryMinutese.g. 15- Saves the whole world on a timer, in minutes.
0turns the timer off.
Ports are managed by the Game Hosting Panel, and your admin account is on the Players page under Your admin login, so leave DefaultPort and UDPPort alone.
Sandbox settings: build them in the game, then upload
Many sandbox values in servertest_SandboxVars.lua are numbers that stand for menu choices, so editing them by hand invites mistakes. The reliable method is to use the game's own editor on your PC:
- In Project Zomboid, open Host, then Manage Settings, and create a new settings file (name it after your server, for example
servertest). - Work through the tabs. Every option has a description, and the sandbox tabs match the single-player custom sandbox screen.
- Save. The game writes the files to
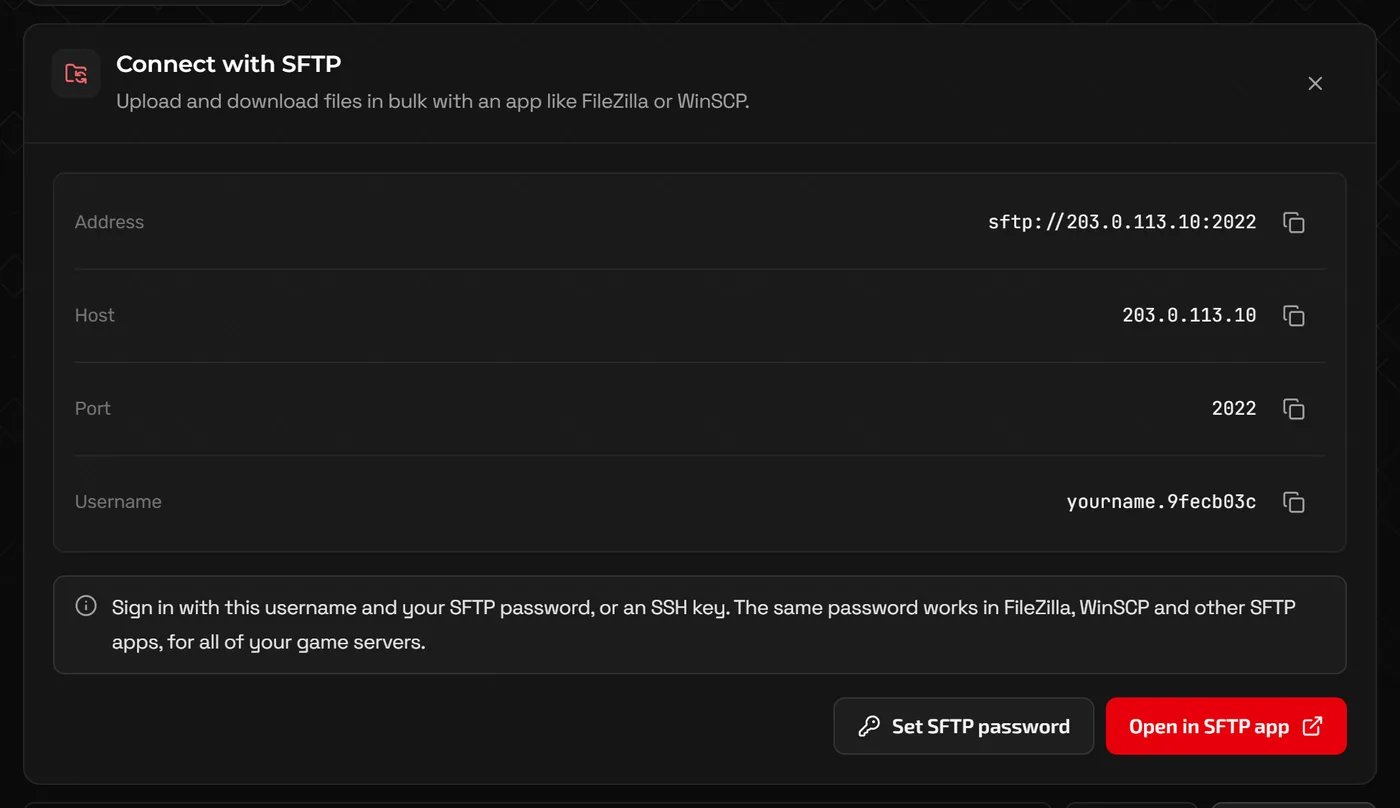
Zomboid/Server/in your user folder on your PC (on Windows,C:\Users\<you>\Zomboid\Server\). - Stop your server, click Create backup on the Backups page, and upload
servertest_SandboxVars.lua(andservertest.iniif you edited it) toZomboid/Server/with Files or SFTP, replacing the old files. - Start the server.
A few values are plain numbers and easy to tweak directly:
ZombieConfig = {
    PopulationMultiplier = 1.0,   -- 0.5 halves the zombie count, 2.0 doubles it
    RespawnHours = 72.0,          -- 0 turns zombie respawn off
},
WaterShutModifier = 14,           -- days until the water shuts off
ElecShutModifier = 14,            -- days until the power shuts off
Warning: Loot settings, and some zombie settings, only affect parts of the map nobody has visited yet. For big changes, a fresh world (a new save) gives the most predictable result.
Adding Steam Workshop mods
Project Zomboid needs two lists in servertest.ini, and mods fail to load when they do not agree:
WorkshopItems=: the Workshop ID, the number at the end of the mod's Steam Workshop URL (...?id=1234567890).Mods=: the Mod ID, listed near the bottom of the Workshop page description asMod ID: ....
Tip: The panel's Mods page fills in both lists for you: under Add mods, paste a link to a Workshop mod or collection and it finds the Mod IDs and map folders. The steps below are for doing it by hand.
- Stop the server and open
servertest.ini. - Add each Workshop ID to
WorkshopItems=and each Mod ID toMods=, separated by semicolons with no spaces. - Put dependency and library mods before the mods that need them in
Mods=. - Save and start the server. It downloads the Workshop items on startup, which can take a few minutes the first time. Players download them automatically when they join.
WorkshopItems=1234567890;2345678901
Mods=ExampleLibrary;ExampleMod- One Workshop item can contain several Mod IDs, sometimes alternatives to each other. Only add the ones the mod page tells you to.
- Build 42 changed how some mods are packaged, so follow the mod page for the build your server runs.
Custom maps
Map mods need a third entry. Add the Workshop ID and Mod ID as usual, then add the map's folder name (shown on its page as Map Folder:) to Map=, before the base map, which must stay last:
Map=Your Map Folder;Muldraugh, KYWhen mods update
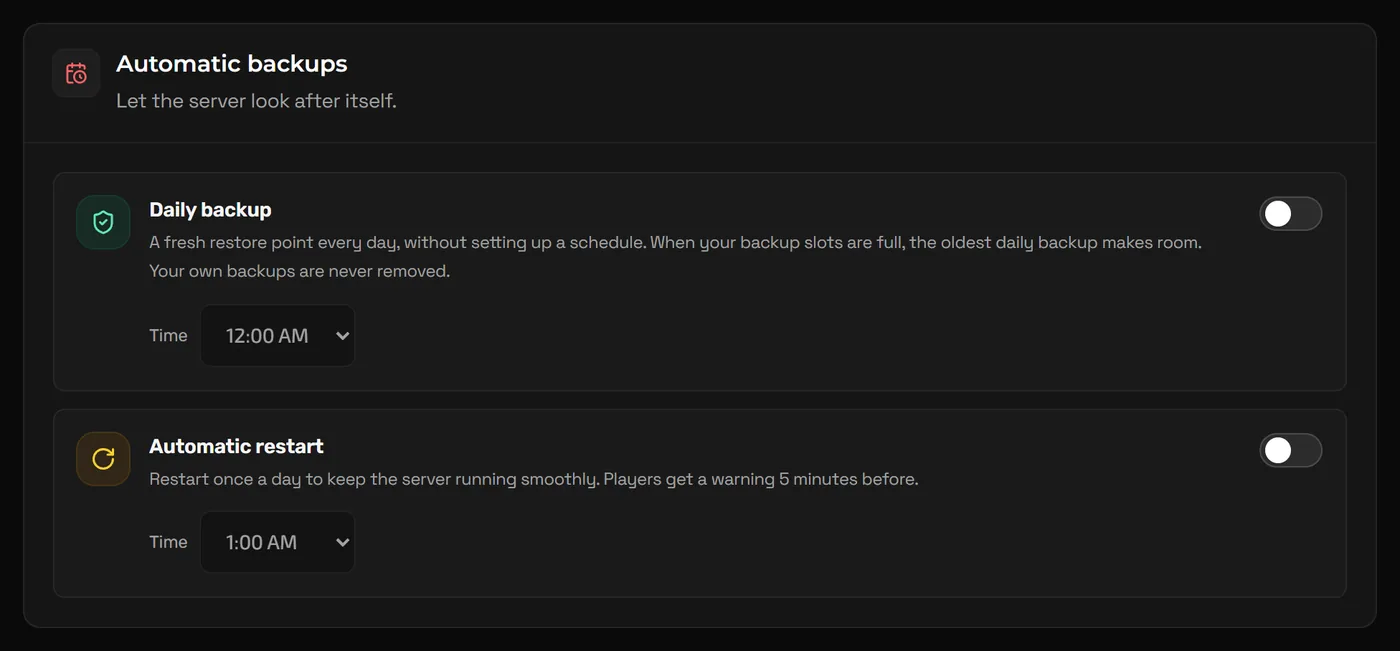
If players see an error that a Workshop item version is different from the server's, a mod has updated on Steam but your server still has the old copy. Restart the server so it downloads the new version. Admins can run /checkModsNeedUpdate to check first. Turn on Automatic restart on the Backups page and the server restarts once a day, with a five-minute warning, picking up mod updates without anyone having to remember.
Admins, access levels and whitelists
Commands are typed in game chat with a leading slash. In the panel console, type them without the slash. Use the player's server username (the name they created when they first joined), not their Steam name.
/setaccesslevel "PlayerName" admin      admin, moderator, overseer, gm, observer or none
/adduser "PlayerName" "password"        create an account on a whitelist-only server
/addusertowhitelist "PlayerName"        whitelist a player who is online now
/removeuserfromwhitelist "PlayerName"
/kickuser "PlayerName" -r "reason"
/banuser "PlayerName" -r "reason"
/unbanuser "PlayerName"
/servermsg "Restart in 10 minutes"
/players
/save
/reloadoptions                          reload servertest.ini without a restart
The server's first admin account is created when the server is first set up. On NEXUS, the Players page shows it under Your admin login (username and password, with Copy password), or ask support if you do not have it. While the server runs, the same page adds accounts on an invite-only server and kicks or bans players without typing commands.
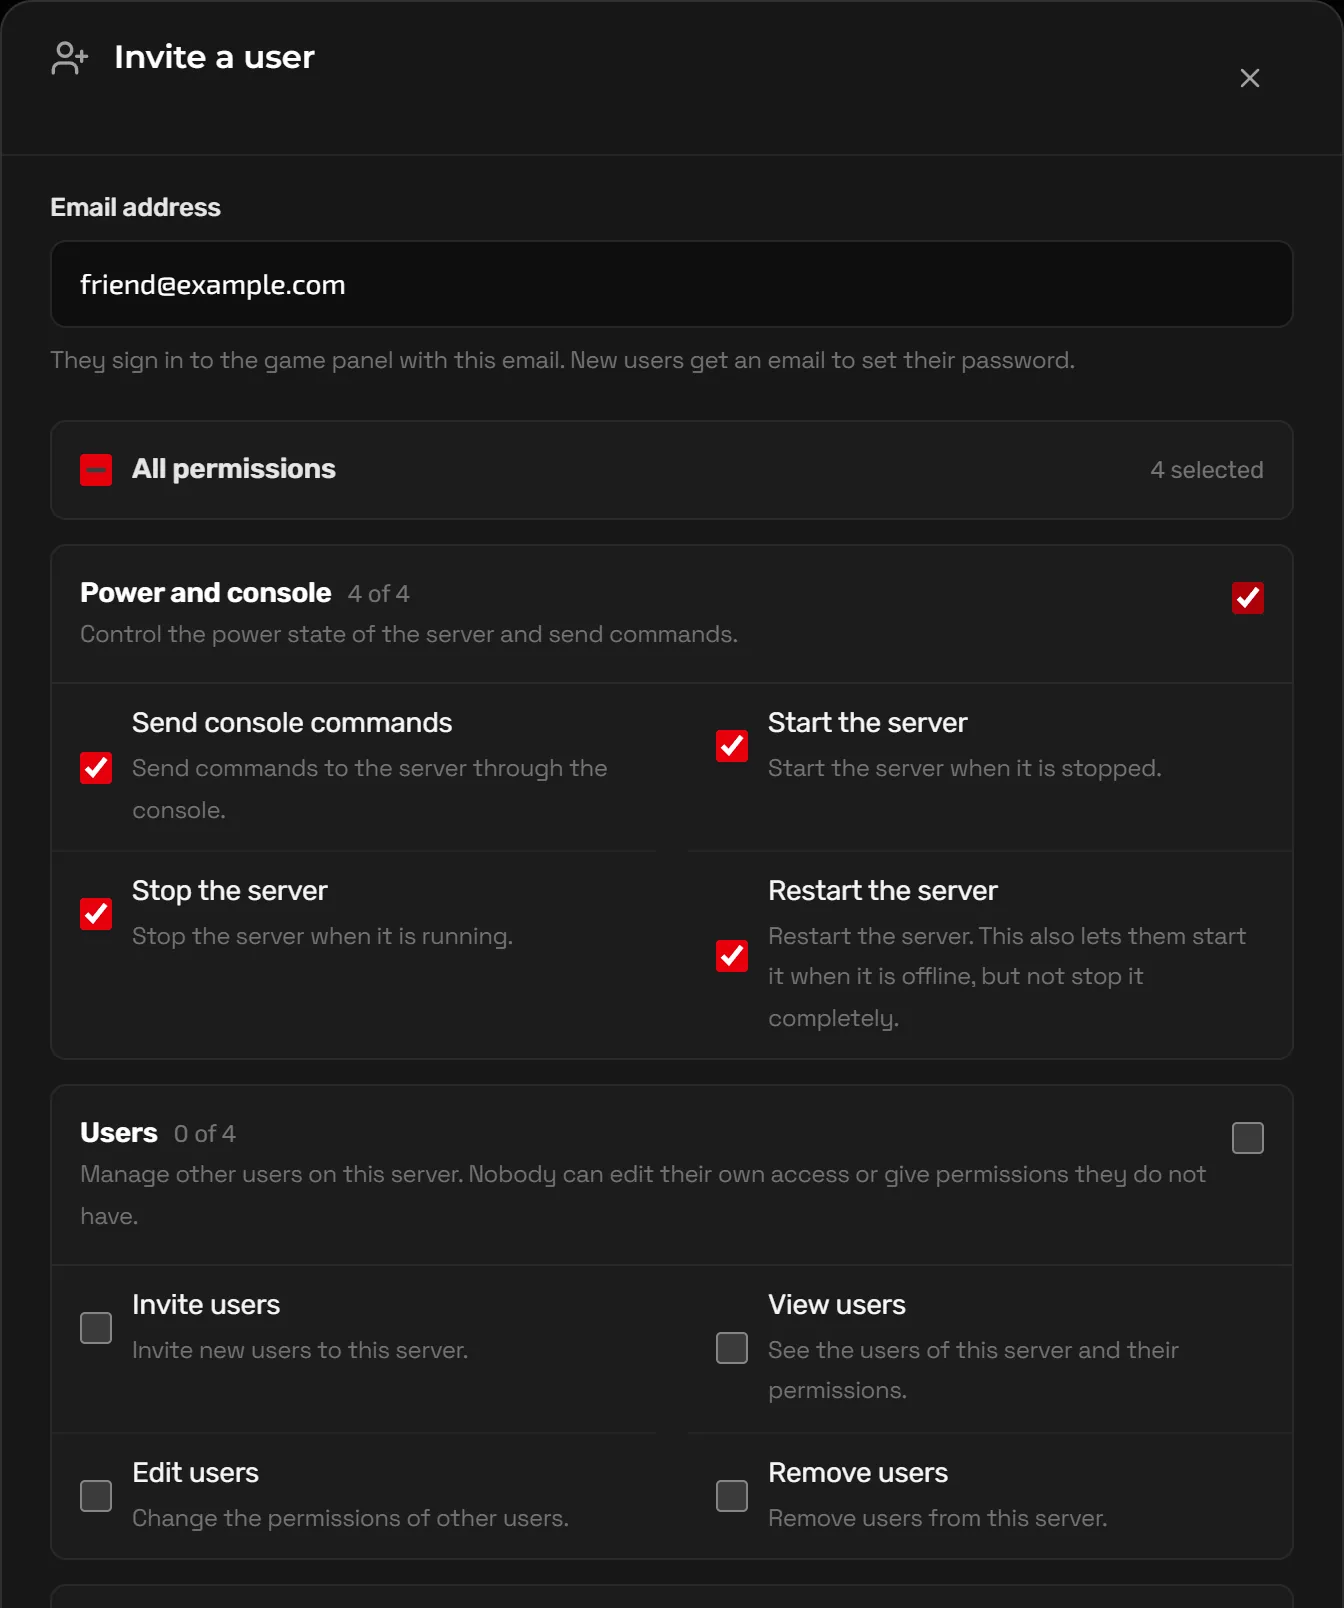
Admin access in game is separate from the panel. To let a co-admin restart the server or edit files without your login, click Advanced tools at the bottom of the sidebar, open Users and invite them with only the permissions they need.
FAQ
Why are my Workshop mods not loading?
Check that every mod is in both WorkshopItems= and Mods=, that the Mod ID is spelled exactly as on the Workshop page, and that dependencies come first. The console lists mods that failed to load when the server starts.
How do I turn on a whitelist?
The panel calls this invite only: turn off Anyone can create an account on Game settings (or set Open=false in servertest.ini) and restart. Existing accounts keep access. Add new players on the Players page while the server runs, or with /adduser "name" "password", and send them their login.
Can I change sandbox settings on an existing world?
You can, and some changes apply straight away, but many only affect areas that have not been visited yet. Back up first, and consider a new save for big changes.
How much memory does a modded server need?
It depends on player count and mod list, and map mods add the most. If the server lags or runs out of memory as your list grows, move up a plan with Upgrade / Downgrade in the client portal.
Related guides
How to Host a Valheim Dedicated Server
Server name and password rules, crossplay and join codes, world modifiers, moving your existing world, and admin lists.
Rust Server Admin Commands and Setup Guide
server.cfg basics, ownerid and moderatorid, everyday admin commands, Oxide and Carbon plugins, and how wipes work.
How to Make a Minecraft Server to Play With Friends
Java or Bedrock, how much RAM you need, the server.properties settings that matter, ops and whitelists, and how friends connect.