
How to Make a Minecraft Server to Play With Friends
A Minecraft server gives your group one world that stays online whether or not the person who started it is playing. This guide takes you from an empty server to friends joining, and covers the decisions that trip people up: Java or Bedrock, which server software, and how much memory you actually need.
On this page (9 sections)
The steps use the NEXUS Game Hosting Panel, but the Minecraft parts (server.properties, console commands, whitelists) work the same on any server. The panel has a Simple and an Advanced mode; this guide uses the Simple mode page names and gives the Advanced name in brackets where it differs. Switch with Advanced tools at the bottom of the sidebar, or the Simple / Advanced buttons in the Advanced view.
Decide on Java or Bedrock first
Java Edition and Bedrock Edition are different games with different servers. Java is the PC version most modded and plugin servers use. Bedrock is the version on consoles, phones, tablets and Minecraft for Windows.
- Everyone on PC (Java launcher)? Run a Java server. You get the full choice of plugins, mods and modpacks.
- Friends on phones or consoles? Run a Bedrock server, or run a Java server with the Geyser plugin so Bedrock players can join too (see our Geyser crossplay guide).
- Version must match. A player on one Minecraft version (for example 26.1) can only join a server on the same version, unless the server runs a plugin such as ViaVersion. Pick the version your group plays.
Which server software?
- Vanilla: the official server from Mojang. No plugins or mods.
- Paper: a faster drop-in replacement for vanilla that runs Bukkit and Spigot plugins. The best default for most friend groups and public servers.
- Forge, NeoForge or Fabric: mod loaders. Choose one of these when you want mods that add blocks, items or mobs, and see our guide to installing Minecraft server mods.
How much RAM does a Minecraft server need?
Memory needs depend more on what players do than on how many there are. As a rough guide, 2 GB suits vanilla or Paper for a few friends, 4 GB a bigger group with plugins, and 8 GB or more modpacks. You can change plan later with Upgrade / Downgrade in the client portal.
Our Minecraft RAM guide goes into detail: what uses memory, how to read the memory graph, and the lag that more RAM will not fix.
Step 1: Create the server and install your version
- Choose a plan on the Minecraft server hosting page. Your server deploys automatically, usually in under 60 seconds.
- Sign in to the client portal and click Open next to your Minecraft server. The Home page shows your server address with Copy address and Invite friends buttons. The first time, a guided setup can pick and install the server software for you; choose Skip for now to do it yourself with the next step.
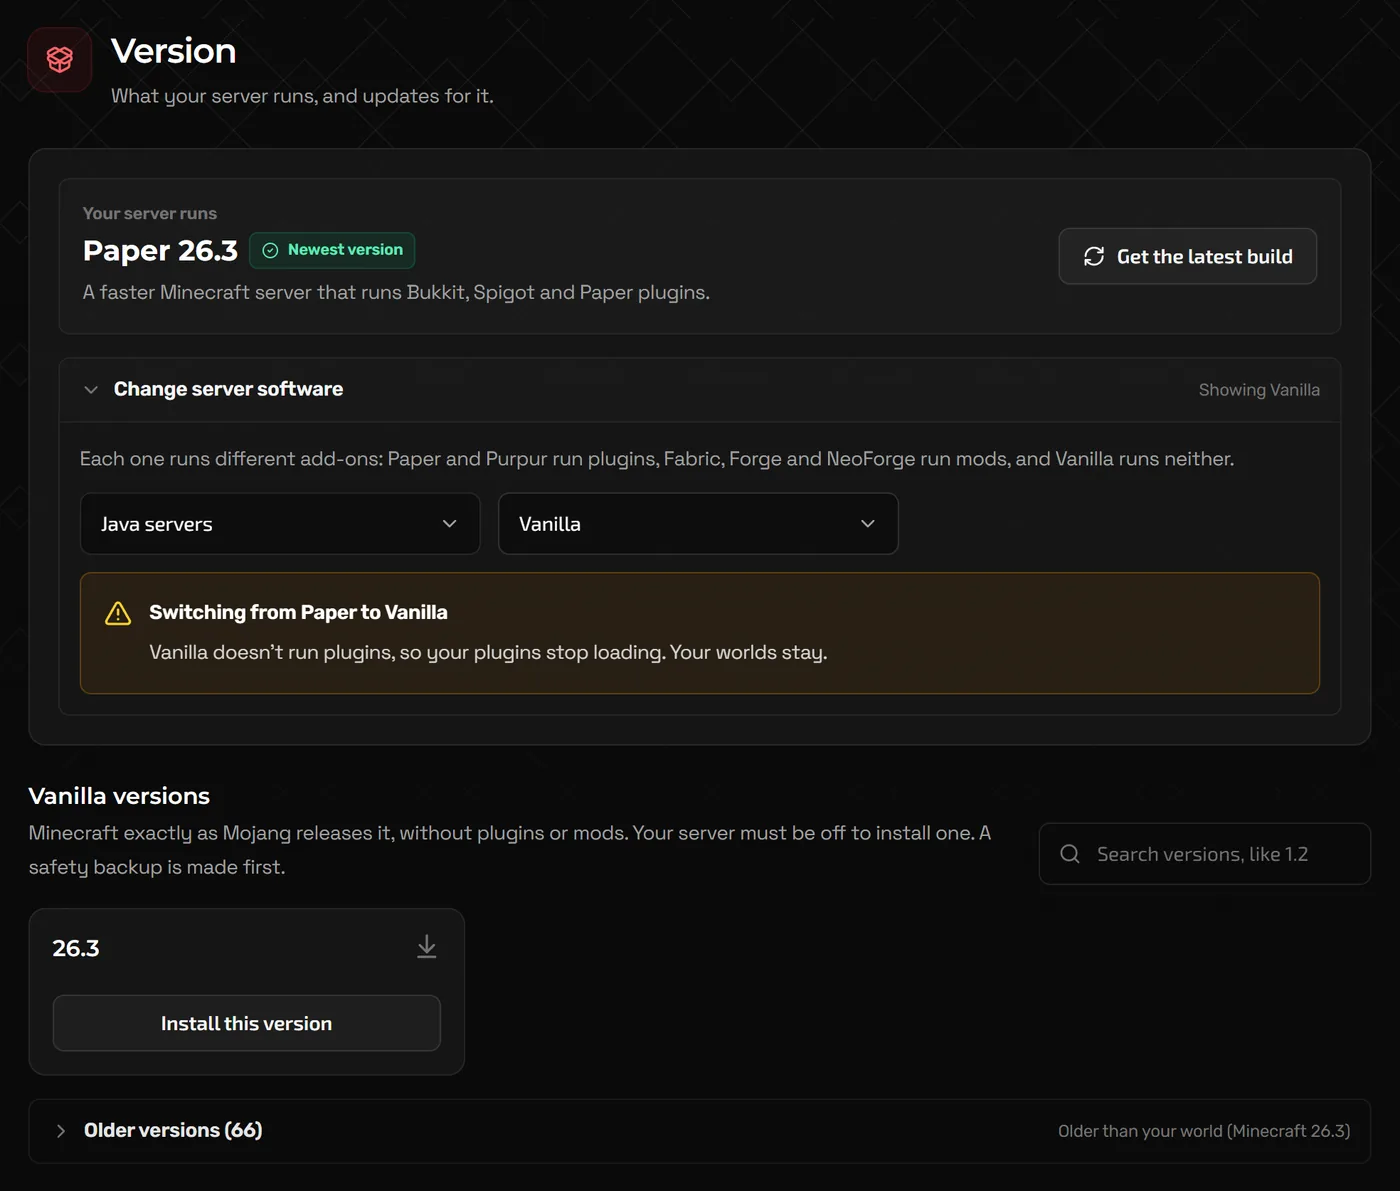
- Stop the server, then open Version (Advanced: Version changer). Above the list of versions, pick the Server software, for example Paper (Software group narrows it to Java servers, Modded or Bedrock and proxy), find your release, or type it in Search versions, and click Install.
- The panel makes and checks a safety backup before it changes anything. When it finishes, start the server from the power buttons at the top. It is ready when the console prints a line like
Done (8.214s)! For help, type "help".
Warning: Minecraft can upgrade a world to a newer version, but not back. Make a backup before changing versions (see Step 5).
Step 2: Set your game rules
The quickest way is the Game settings page. Start from a preset (Classic survival, Relaxed co-op, Creative building or Hard survival), adjust game mode, difficulty, PvP and the rest, then save. Changes apply the next time the server starts. Rarely used options are under More settings, and Edit server.properties in Files at the bottom opens the file itself. Your mod and plugin config files are on Config files in the Advanced view.
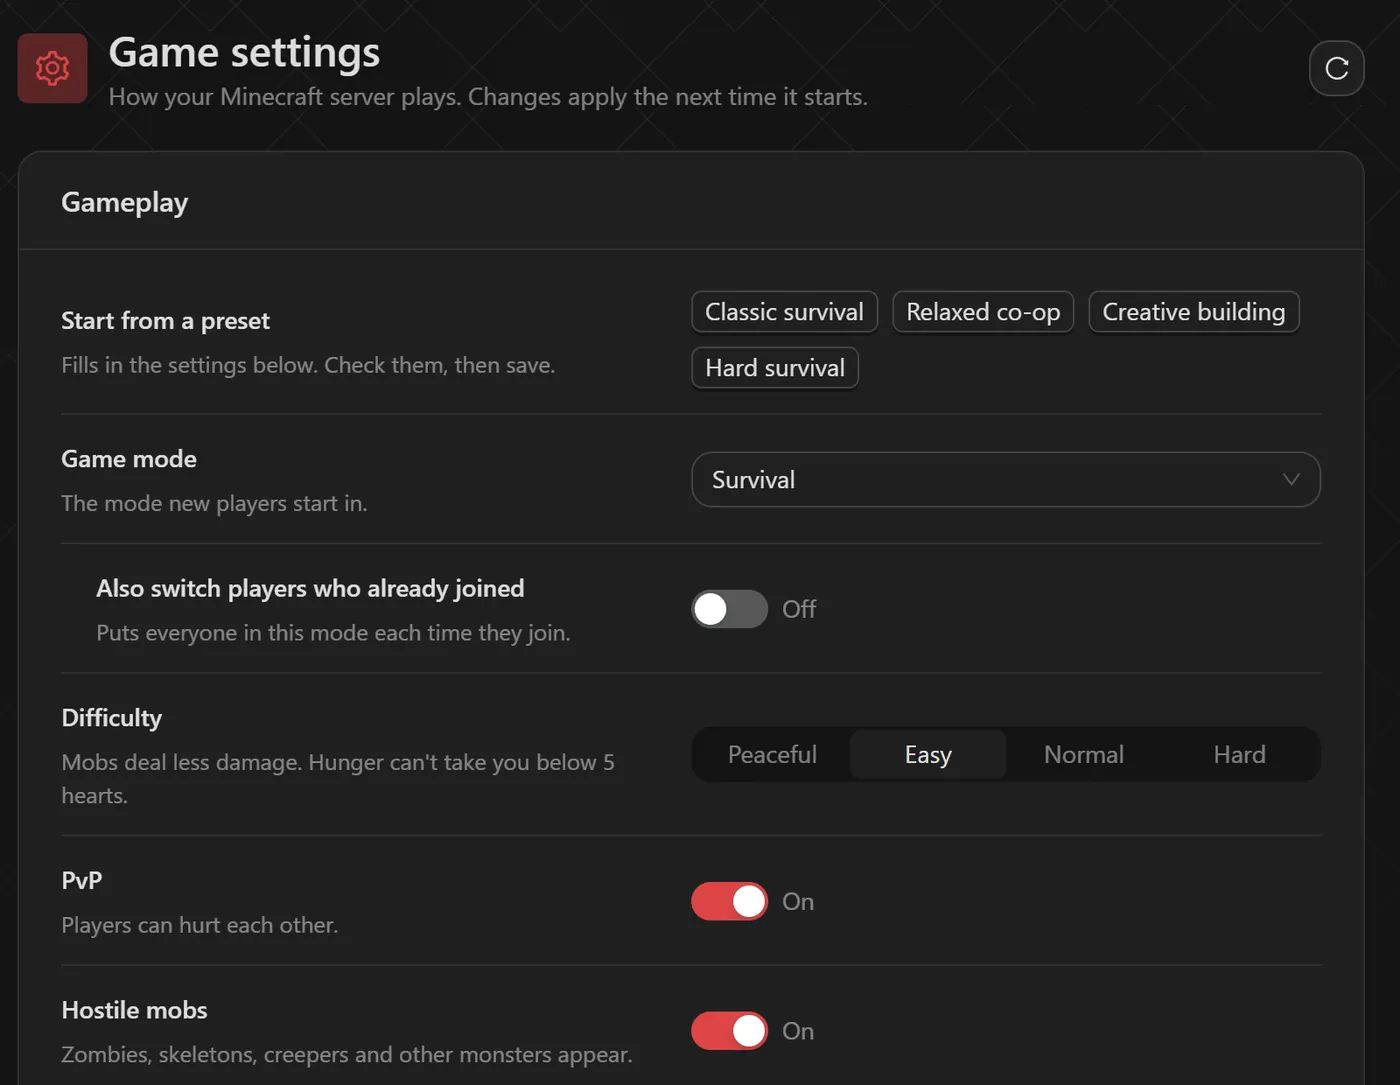
These are the server.properties keys behind the most useful options, in case you edit the file in Files or on Config files (Advanced view):
motde.g. Our Survival World- The message shown under your server name in the multiplayer list. The panel also has an Icon & message page for the message and a server icon.
max-playerse.g. 20- Player slots. Raising it does not add resources, so keep it realistic for your plan.
difficultye.g. normalpeaceful,easy,normalorhard.gamemodee.g. survival- Default mode for new players:
survival,creative,adventureorspectator. pvpe.g. true- Set to
falseto stop players damaging each other. white-liste.g. true- Only players on my whitelist can join. Admins (operators) can always join.
enforce-whiteliste.g. true- Kick people taken off the whitelist (under More settings): online players are kicked as soon as they are removed.
view-distancee.g. 10- How far players can see, in chunks. Dropping to 8 noticeably reduces load.
simulation-distancee.g. 10- How close to a player crops, farms and mobs keep running. Lower it on busy servers.
level-seede.g. -4172144997902289642- Only shapes new worlds. To use a seed, create a new world on the Worlds page.
online-modee.g. true- Require real Minecraft accounts. Leave it on: turning it off lets anyone join with any name, including yours.
Step 3: Make yourself an operator and whitelist friends
Operators (ops) can run admin commands in game. Type these in the panel Console; the leading slash is optional there. In game, the same commands need a /.
op YourName
whitelist add FriendName
whitelist remove FriendName
whitelist list
kick PlayerName Too much TNT
ban PlayerName Griefing
pardon PlayerName
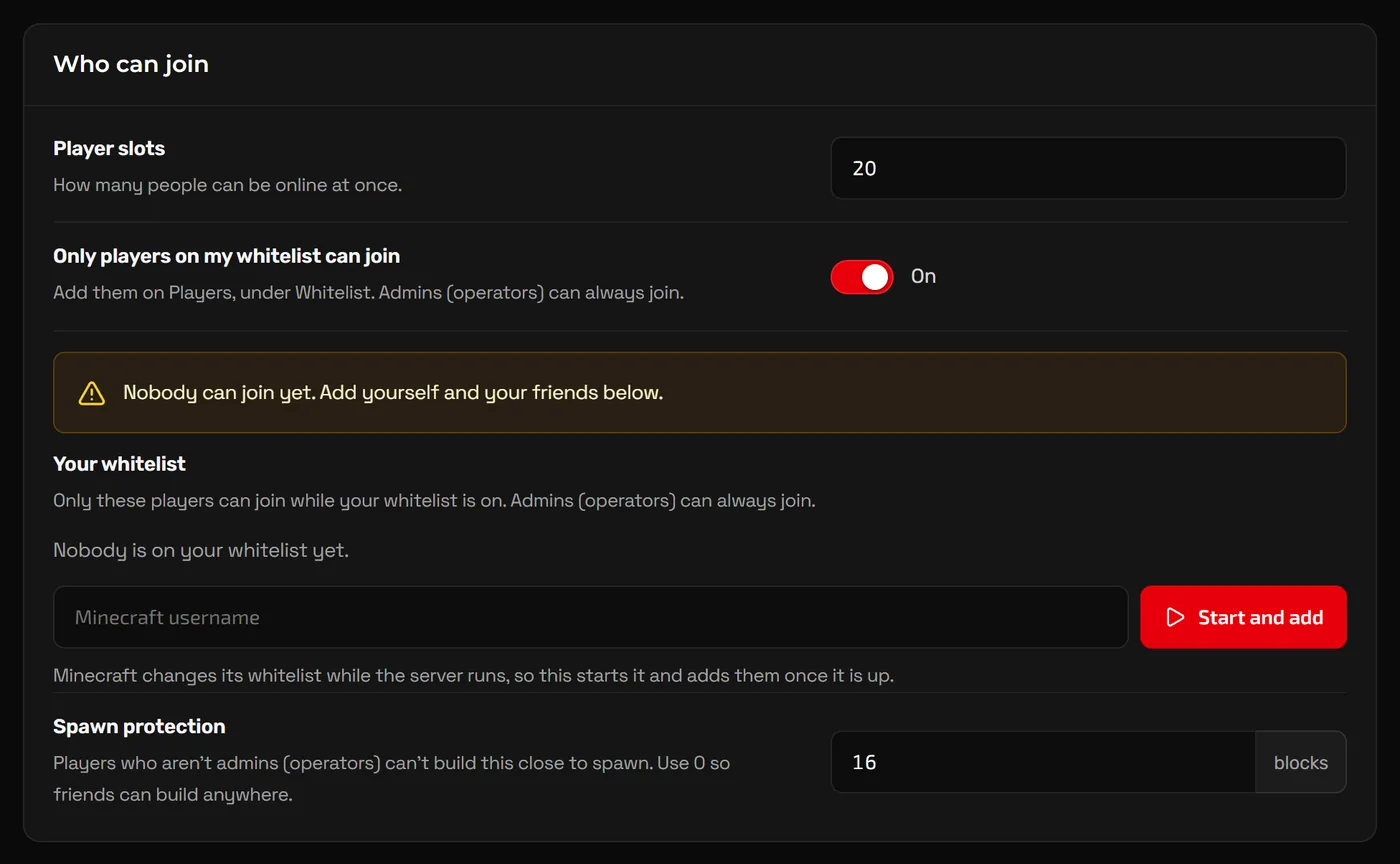
The Players page does the same without commands: the Admins tab has Make someone an admin, and the Whitelist tab adds players by their Minecraft name. If the server is off, Start and add starts it and adds them once it is running.
To lock the server to your group, turn on Only players on my whitelist can join under Who can join on Game settings. Players already on Your whitelist still get in, and you can add players there too.
- Only op people you trust. Ops can change game modes, teleport and ban other players.
- Whitelisted names are stored in
whitelist.jsonand ops inops.json, so you can also edit them in Files. - Names must match the player's Minecraft username exactly.
Step 4: Share the address and connect
Your server address (IP and port) is at the top of the Home page in the panel, with a Copy address button. Invite friends next to it shows the address with what friends need and how to join, and Copy invitation puts it all in one message. While your whitelist is on, it lets you add their names first.
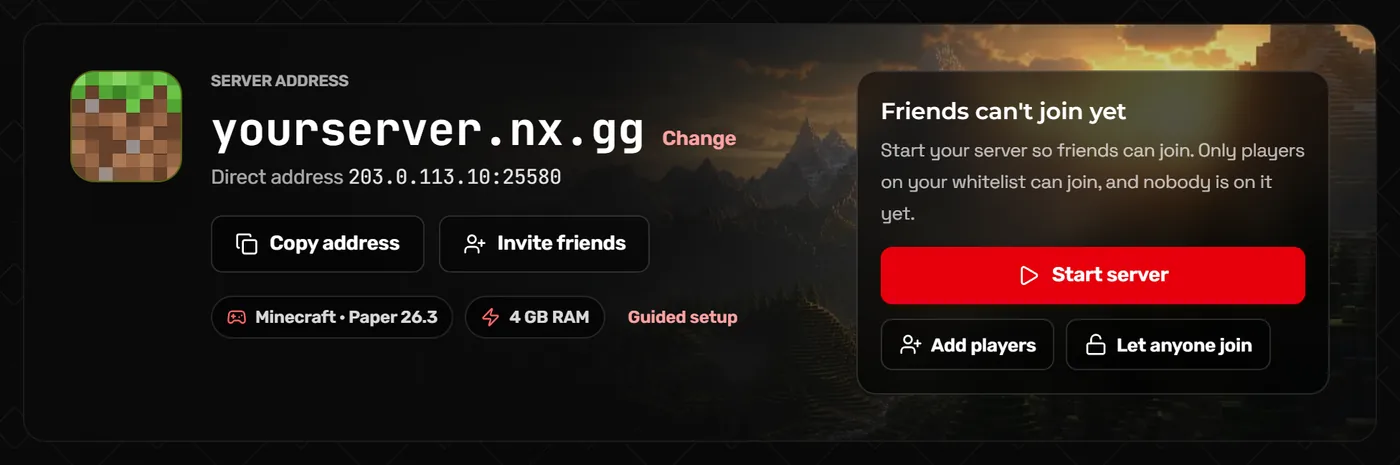
- Java: open Multiplayer, click Add Server, paste the address exactly as Home shows it (for example
yourserver.nx.gg, or the direct address with its port) and click Done. - Bedrock (phone, tablet, Windows): open Play, go to the Servers tab, choose Add Server, and enter the IP and port in their separate boxes.
- Send friends the same address. If they are on your whitelist (or it is off), they can join straight away.
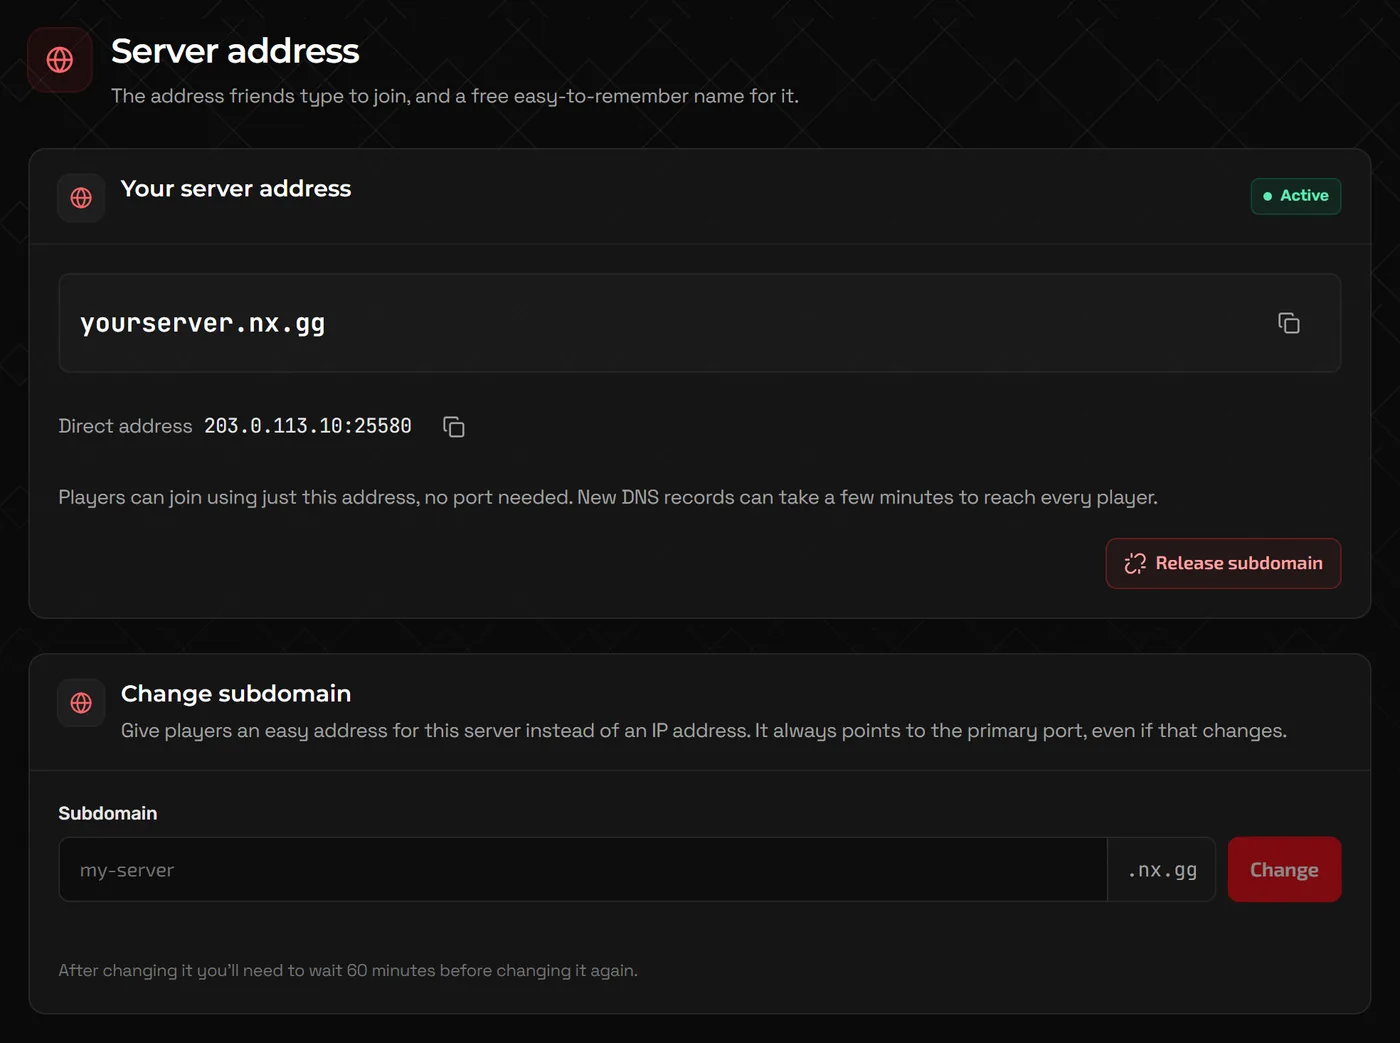
Rather share a name than numbers? Open Server address (Advanced: Subdomain) and claim a free .nx.gg subdomain. It always points to your server, even if its IP address changes.
Tip: Console editions of Bedrock (Xbox, PlayStation, Switch) cannot add custom servers from the menu. PC and mobile players can join directly.
Step 5: Back up before big changes
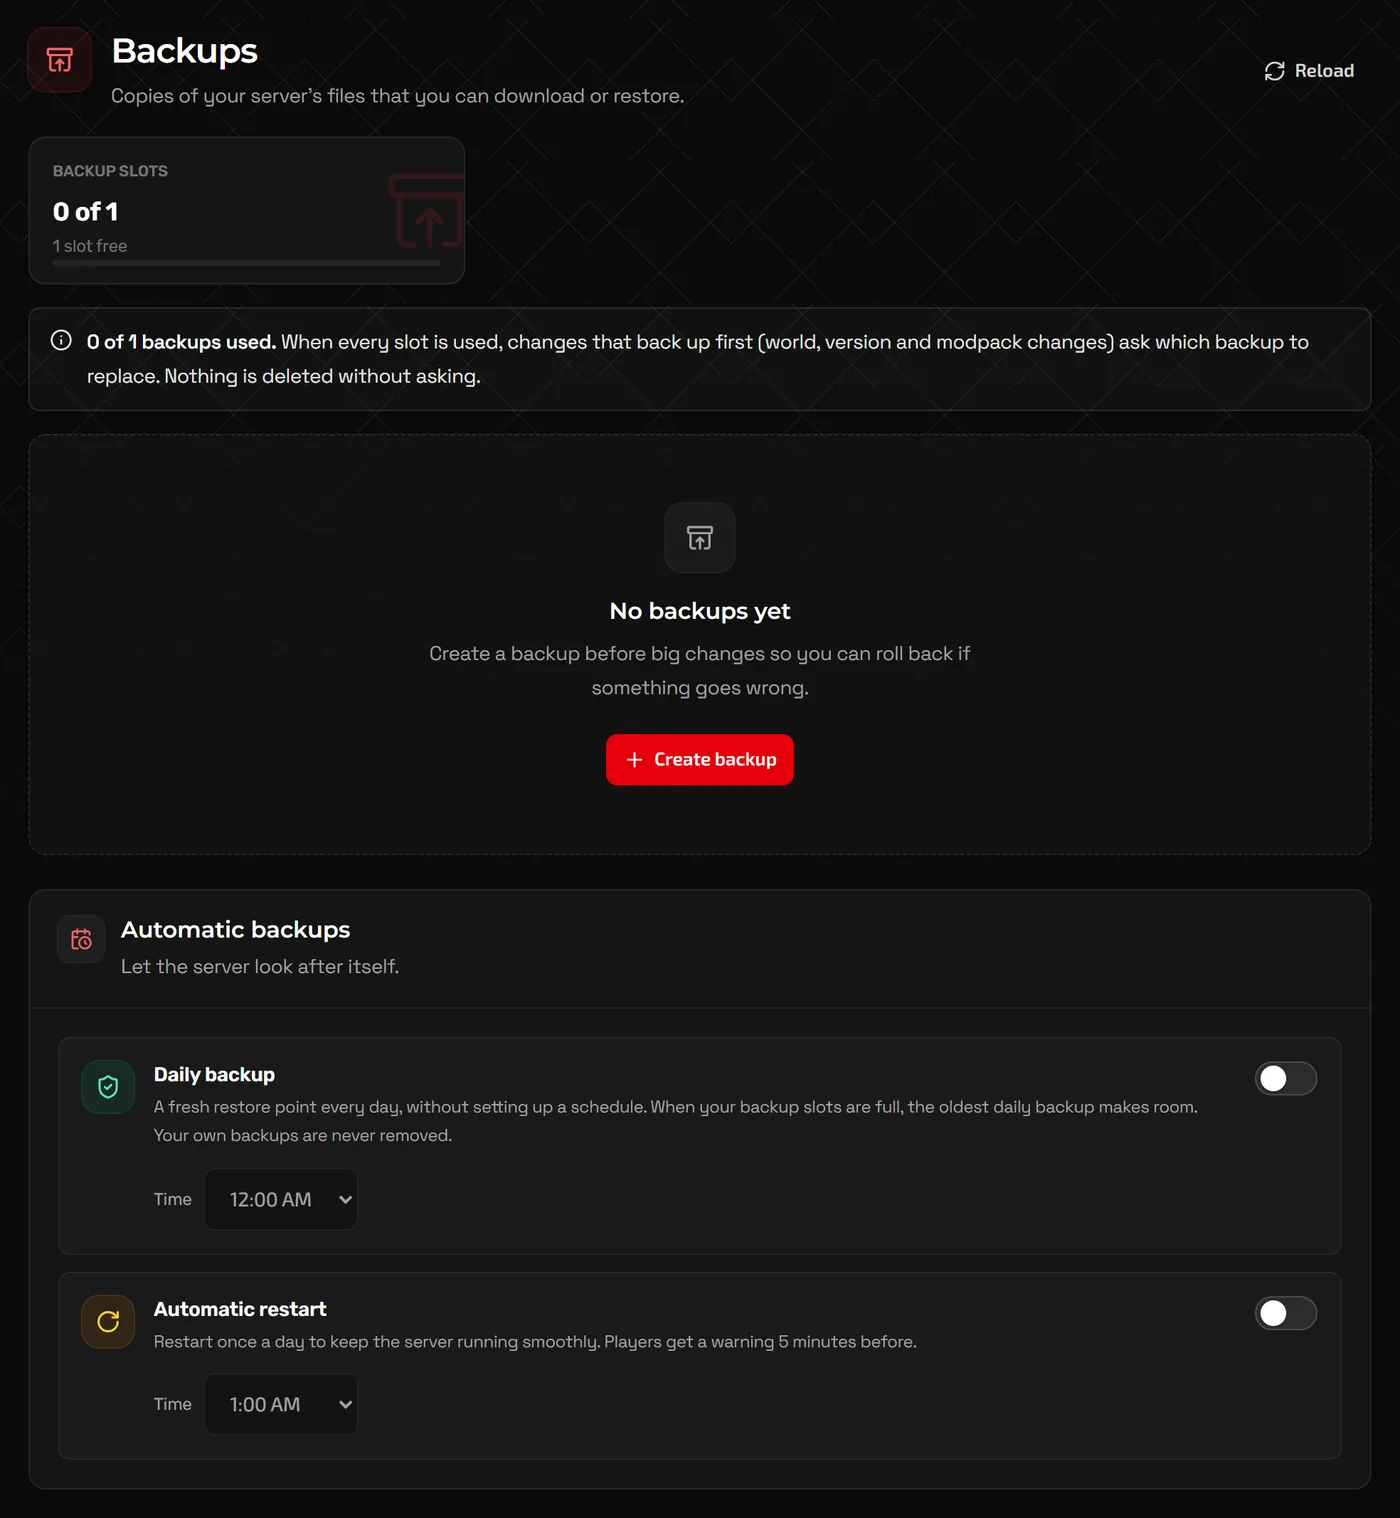
Open Backups and click Create backup before updating versions, adding plugins or trying a new world. Your server has a set number of backup slots, and the page shows how many are used; when they are full, delete an old backup to make room. A backup's Download button keeps a copy on your own PC.
- Daily backup: turn it on and pick a time for a fresh restore point every day. When your slots are full, the oldest daily backup makes room; backups you made yourself are never removed.
- Automatic restart: restarts the server once a day at the time you choose, with a five-minute warning to players.
- The panel also makes a safety backup before installing a modpack or changing versions.
For anything more custom, the Advanced view has Schedules, where you set the timing with cron fields and add tasks.
If friends cannot connect
The usual causes are a missing port in the address, a version mismatch, the whitelist, or the server not having finished starting. Our Minecraft connection troubleshooting guide goes through each one with the error message players see and the panel page that fixes it.
FAQ
Can Java and Bedrock players play on the same server?
Not by default, but a Java server running the Geyser plugin (with Floodgate) lets Bedrock players join. Our Geyser crossplay guide walks through the setup.
Do my friends need to own Minecraft?
Yes. With online-mode=true (Require real Minecraft accounts), which you should keep, every player needs a legitimate Minecraft account for the edition the server runs.
Can I move my single-player world to the server?
Yes. Stop the server, zip the world folder from your saves directory and upload it in Files (SFTP is easier for big worlds), extract it in the server root, then open Worlds and click Make default on it (this sets level-name in server.properties). Current world on Game settings shows which world loads, with a Manage worlds link.
How do I connect with SFTP?
Open Files and click Connect with SFTP. It shows the address (it starts with sftp://), the host, the port and your username, with Set SFTP password to choose the password you sign in with. Open in SFTP app opens an installed client such as WinSCP or FileZilla.
Related guides
How to Install Mods on a Minecraft Server (Forge, Fabric, NeoForge)
Pick the right mod loader, install mods and modpacks, keep client-only mods off the server, and use plugins on Paper instead.
How to Make a Terraria Server (Vanilla and tModLoader)
Create or upload a world, the serverconfig.txt settings, console commands, and running tModLoader mods on your server.
How Much RAM Does a Minecraft Server Need?
RAM by player count, plugins, mods and modpacks, how to read the memory graph, and when RAM is not the real problem.